Calibration
How to calibrate the MachineBlocks LEGO® compatible STL generator for a perfect fit.
Original LEGO® bricks are cast from relatively soft ABS plastic to an accuracy of a tenth of a millimeter. 3D printed bricks, on the other hand, are generally harder and have small irregularities or inaccuracies depending on the printer. Depending on the material and the nozzle temperature, the brick also contracts to varying degrees when it cools. In order to achieve a high accuracy of fit, these differences must be compensated for by calibrating the STL generator.
1. Print the Calibration Tool
First, the Calibration Tool must be printed on exactly the same printer with exactly the same filament and with exactly the same temperature settings as the brick that will be printed later.
InformationIf you have problems with printing the calibration tool, check out Troubleshooting
2. Determine the optimal parameter settings
The following parameters influence how well the parts fit with original LEGO® bricks:
- studDiaAdj (studDiameterAdjustment) – Amount in mm added to the diameter of the studs
- wallThickAdj (baseWallThicknessAdjustment) – Amount in mm added to the thickness of the walls
- tubeZDiaAdj (tubeZDiameterAdjustment) – Amount in mm added to the diameter of the vertical tubes
- pinDiaAdj (pinDiameterAdjustment) – Amount in mm added to the diameter of the pins
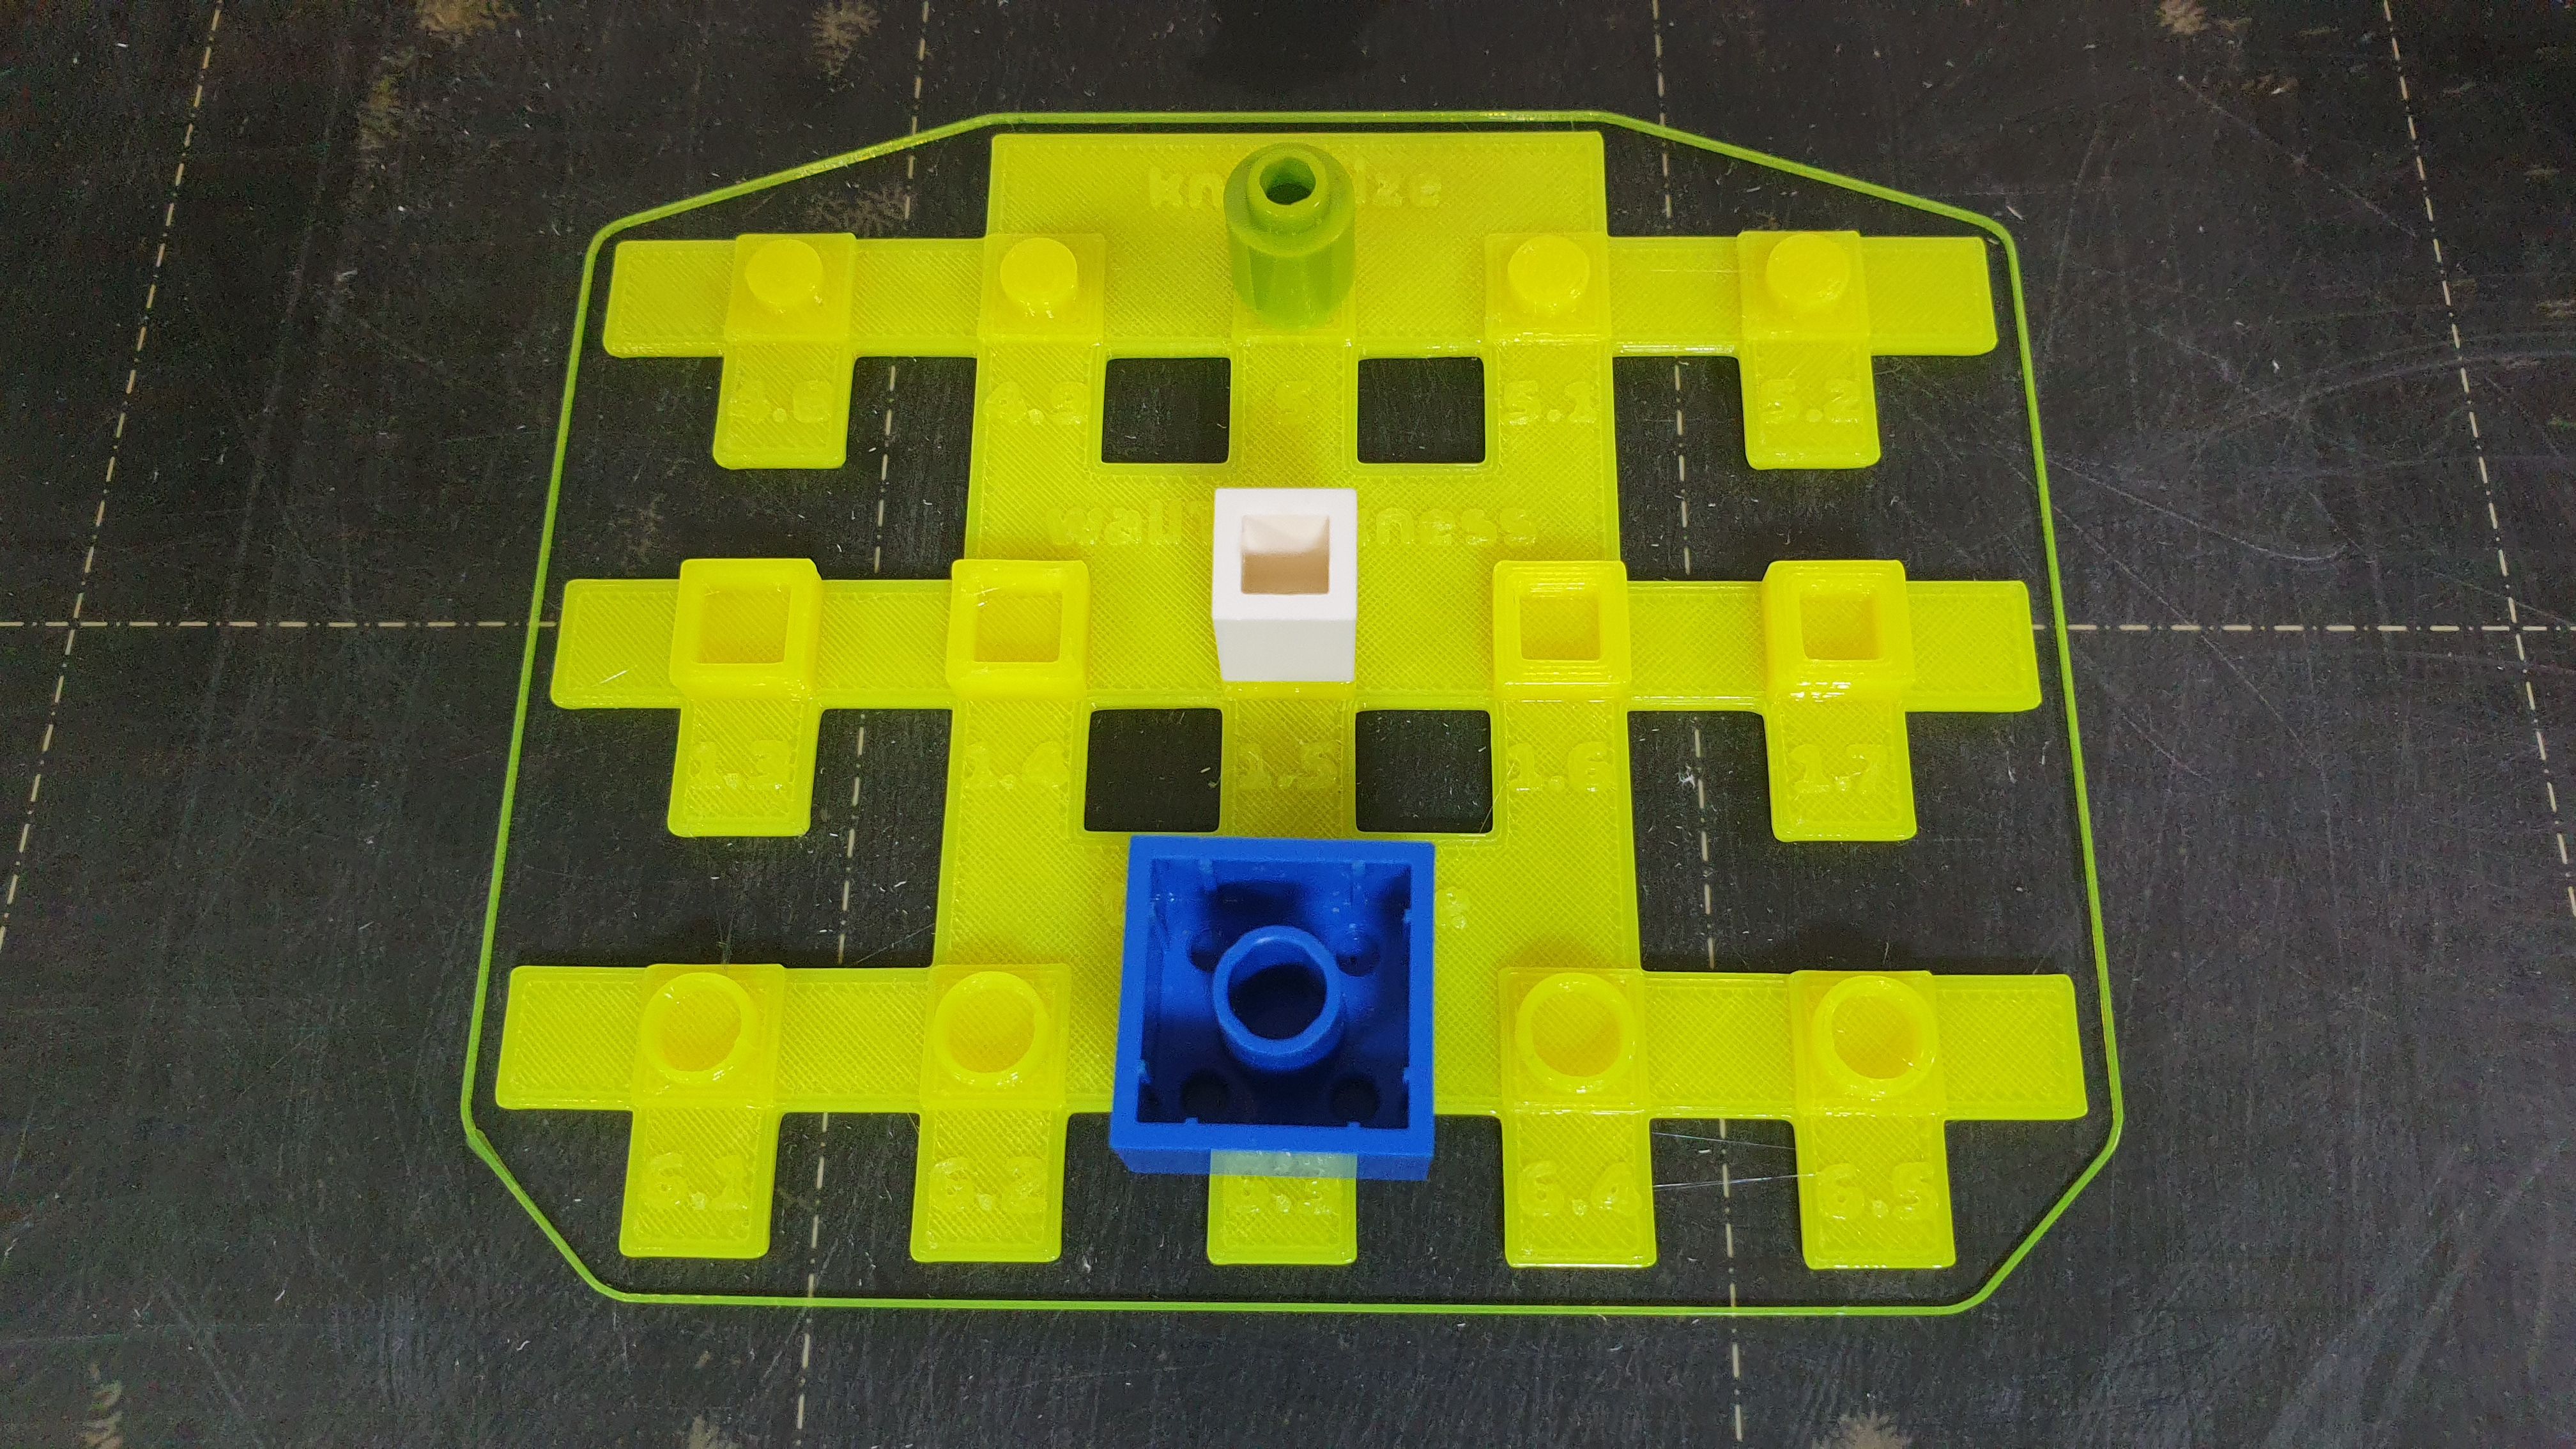
To determine the optimal values for these parameters, take several original LEGO® bricks (or compatible ones from other manufacturers) and place them on the calibration tool as shown in the image.
Start with the smallest setting in each row. If the brick fits too loosely, move to the next setting in the row until the brick fits snugly.
The value shown below each position corresponds to the setting for the respective parameter.
A leading dot represents a decimal point (e.g.,
.1 means 0.1).
If an adjustment value is negative, that amount will be subtracted.
Attention
Do not force original LEGO® bricks onto the calibration tool, as this may damage them.
If excessive force is required, choose the next smaller setting.
3. Update Default Settings
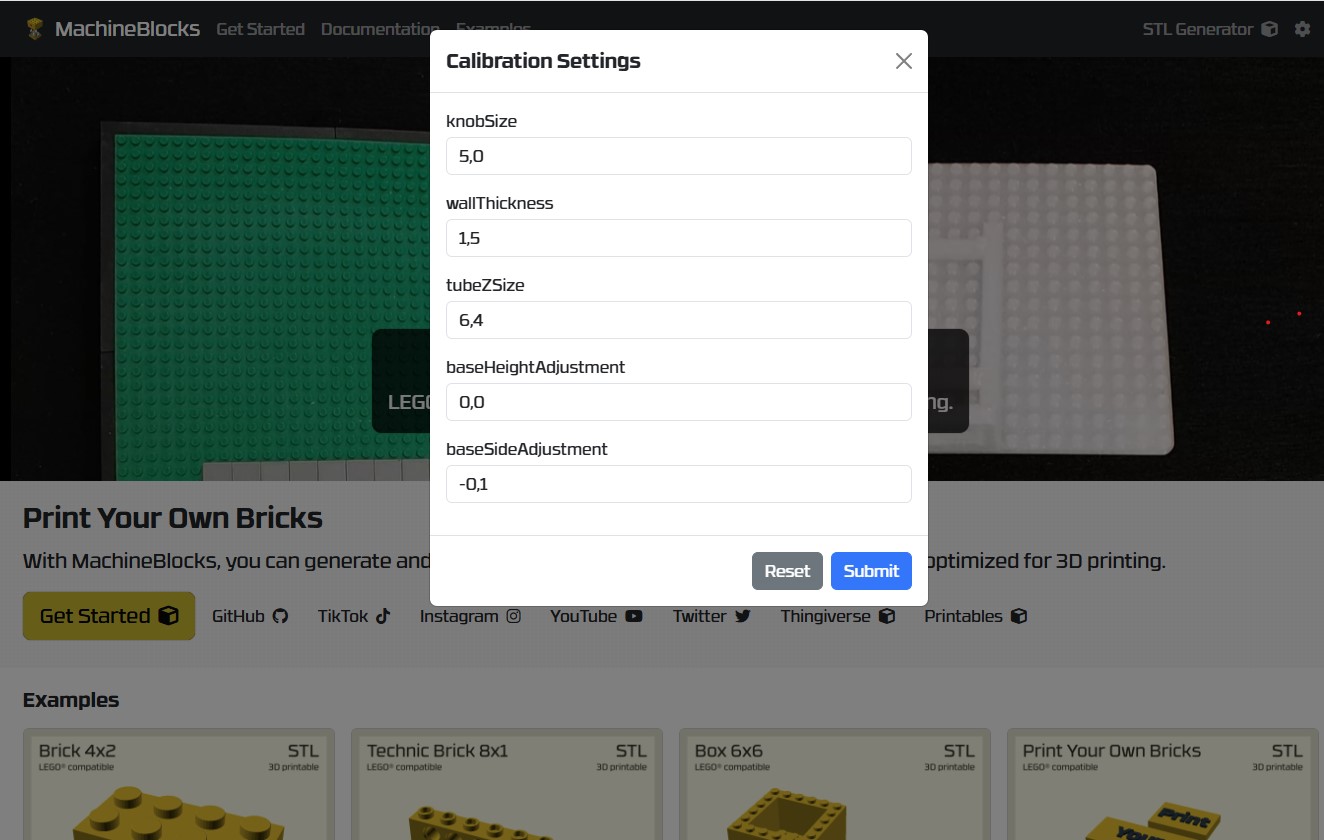
Once you have found the optimum values for knobSize, wallThickness and tubeZSize, save the values as default settings in the STL generator by clicking on the icon at the top right of this website. If you have installed the STL generator locally using OpenSCAD, you have to manually insert the values into the customizer.
4. Print Calibration Bricks
Now you can print the calibration bricks. Make sure the settings for knobSize, wallThickness and tubeZSize from the previous step have been updated correctly in the Customize pane.
InformationIf you have problems with printing the bricks, check out Troubleshooting
5. Test the Bricks
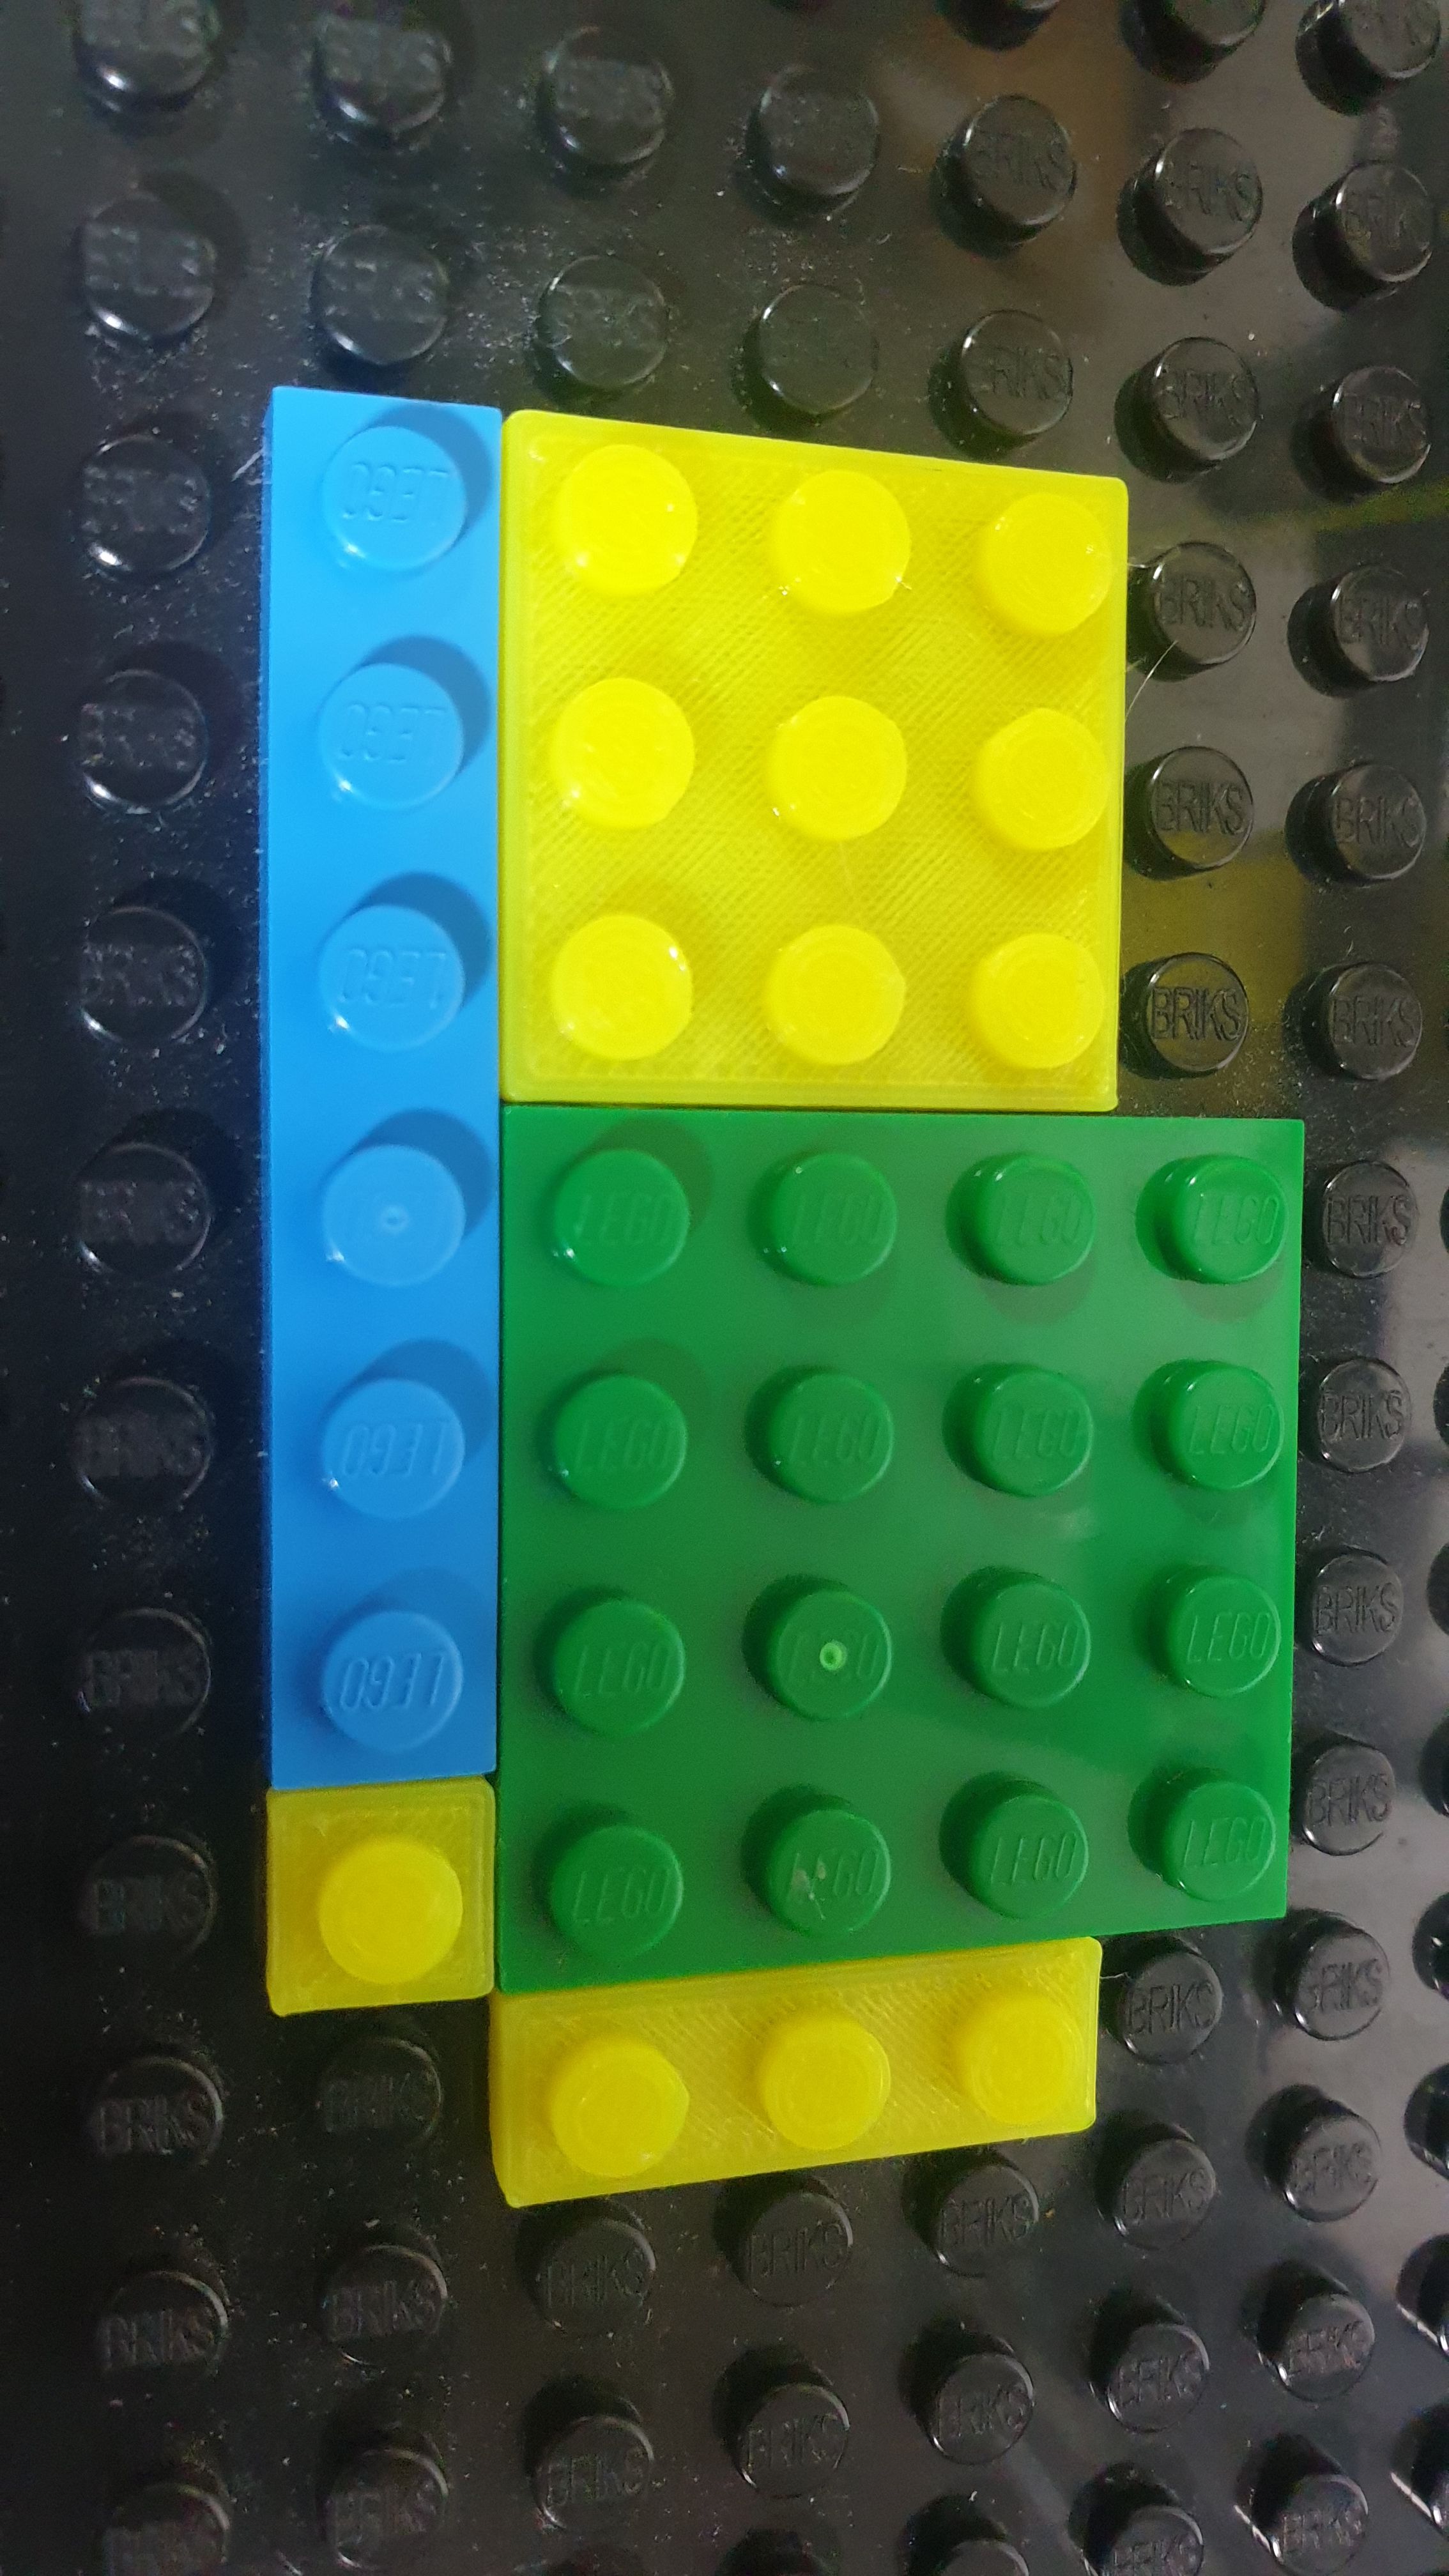
Now assemble the calibration bricks with original LEGO bricks. If the bricks are too loose or too tight, go back to step 2.
Otherwise, compare the height of the printed brick with original bricks of the same type. If the height differs, you can adjust it with the parameter baseHeightAdjustment.
Finally, place 2 printed bricks next to each other on a plate and examine the gap between the bricks. If the gap is too large or too small, you can adjust it using the baseSideAdjustment parameter.
Adjust Sizing
- baseHeightAdjustment - amount of mm that is added to or subtracted from the calculated height of the brick
- baseSideAdjustment - amount of mm that is added to or subtracted from each side of the brick